|
Downloads
Wiki
Build CodeLite
Devs
|
Main /
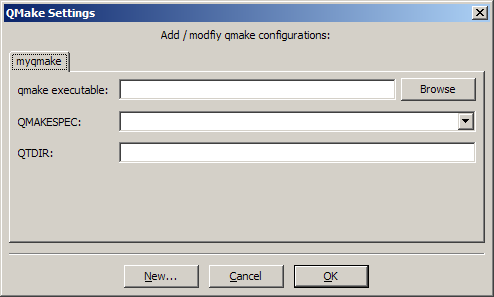
QmakePluginThe Qmake PluginThe Qmake plugin is a codelite plugin which overrides the default build system of codelite, and uses Qt's qmake tool. It does that by producing a .pro file (qmake's project file) from codelite's project file (.project) and executing 'qmake' on the generated .pro file Using this plugin, you can quickly create Qt projects using codelite. Note: This tutorial assumes that you have already downloaded and installed Qt's SDK Defining new qmake
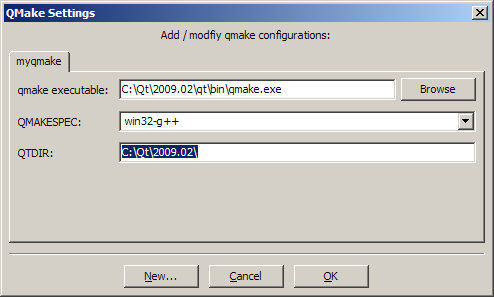
Example: After installing Qt on Windows using MinGW in the installation directory 'C:\Qt\2009.02\', you should have a qmake definition similar to the one below:
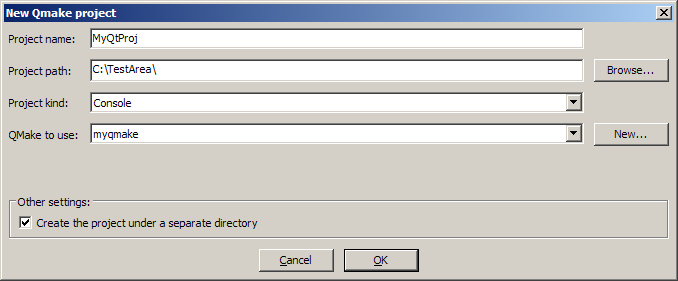
Creating a qmake based projectOnce you have set up a qmake setting to work with, you are now ready to create your first qmake based project.
Your 'New Qmake project' dialog should look similar to this:
Note that in the above dialog, I chose the qmake we defined in the previous steps.
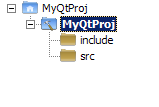
For the above demonstration, I added a main.cpp file which includes the following code: #include <QString>
int main(int argc, char **argv)
{
QString str;
str = "Hello world from QT";
printf("%s\n", str.toLocal8Bit().constData());
return 0;
}
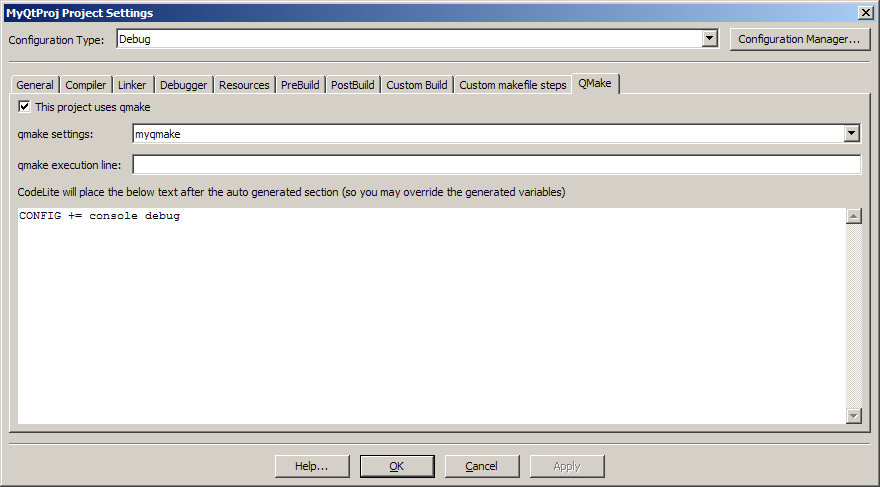
Note: You might need to add your Qt's bin directory to your system PATH environment variable so your application will be able to locate Qt's dlls Qmake project settingsFor many people the above steps are sufficient to work with Qt, but there are cases when you need to add some tweaks to the .pro file. This is done from the project settings: right click on the project, and select 'settings' The 'Project Settings' dialog pops up, but now it has an additional tab, named 'Qmake'
For example, if you want to build a project without the QtGui module, you need to exclude the gui value with the "-=" operator; the following line will result in a minimal Qt project being built: QT -= gui # Only the core module is used. |