The CMake plugin was rewritten in CodeLite 9.1.7 to provide a smoother integration with CMake.
Creating a CMake-based project
- Start by creating a regular C++ workspace
- Next, add a new project and follow the wizard
- On the last wizard page, you have a new choice control:
Build System. Here you should choose CMake
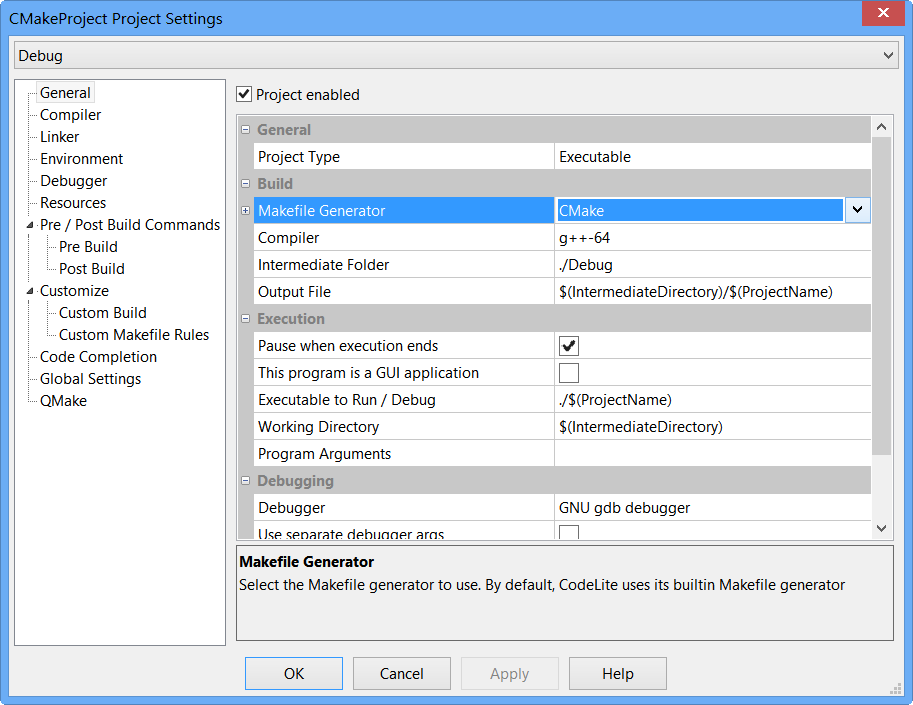
Note that you can always change your mind later and alter the build system from the project settings:
- When a project is marked as a
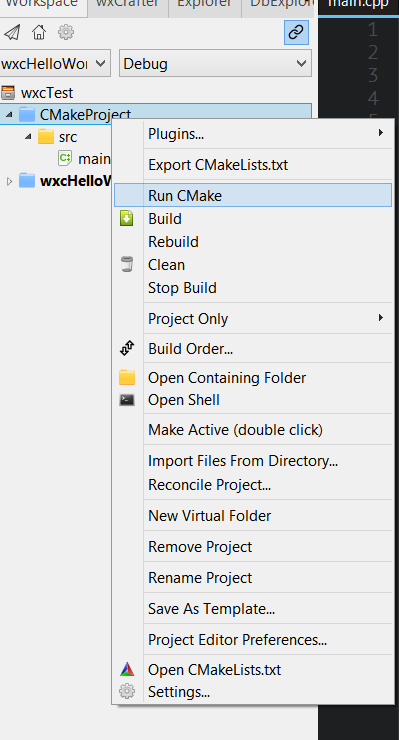
CMake one, there are new CMake-related entries in the project context-menu:
Run CMake - selecting this option instructs CodeLite to generate a CMakeLists.txt file for the workspace and then execute CMake
Export CMakeLists.txt - generate the CMakeLists.txt file but don't execute CMake
Open CMakeLists.txt - open the project CMakeLists.txt file for this project - this entry will be shown only if there actually a CMakeLists.txt file in the project directory
Executing CMake
When you select Run CMake from the project context menu entry, CodeLite does the following:
- Creates the build folder which is is always set to
WORKSPACE_PATH/cmake-build-<CONFIGURATION_NAME>
- Generates
CMakeLists.txt files for the selected project and all its dependencies (as dictated in the project's Build Order)
- Executes the default
CMake command:
- For Windows:
cmake .. -G"MinGW Makefiles"
- Linux and OSX:
cmake ..
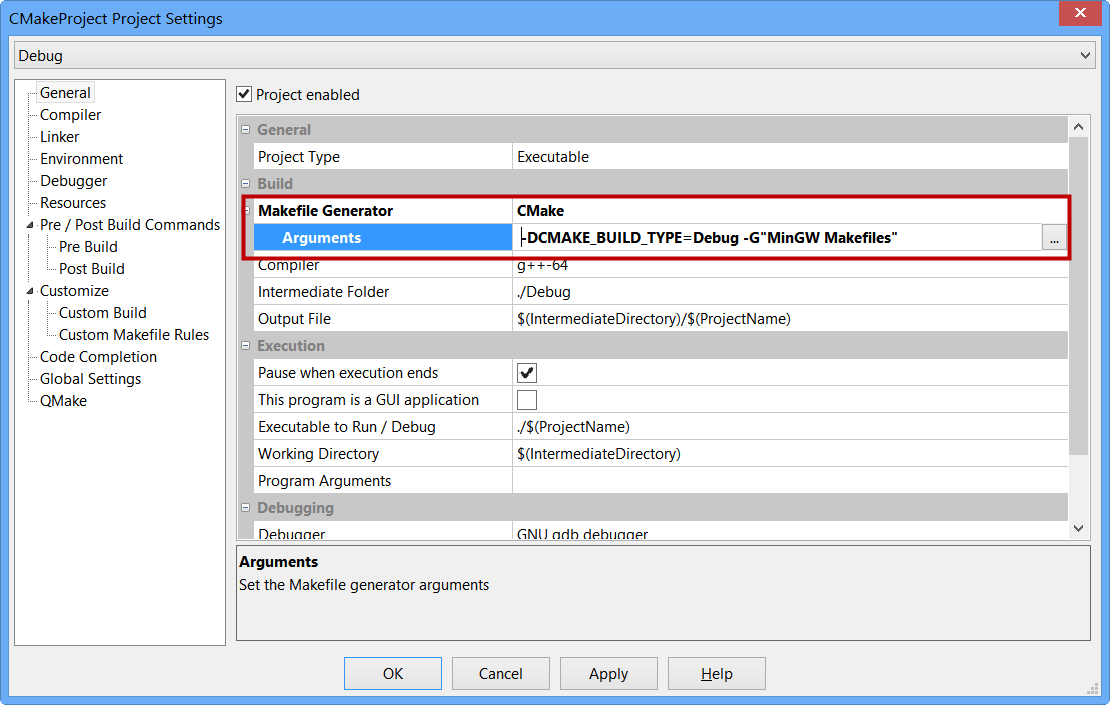
You can configure the arguments passed to CMake in the project settings->general->Makefile Generator->Arguments field. Just type the arguments to pass to CMake; for example:
-DCMAKE_BUILD_TYPE=Debug -G"Unix Makefiles"
Notice that you can pass a different generator (-G"Unix Makefiles") in the argument field, in which case it will replace the default one.
Customise
First, it's important to understand that each generated CMakeLists.txt contains a unique one-line comment at the top:
# -*- CMakeLists.txt generated by CodeLite IDE. Do not edit by hand -*-
If CodeLite finds this comment in every one of the workspace CMakeLists.txt(s), it will consider this as a "green light" for overwriting any or all of the CMakeLists.txt(s)
Removing this comment from any of the workspace CMakeLists.txt files will stop CodeLite from generating any CMakeLists.txts.
How to use your own CMakeLists.txt
As stated above, if your CMakeLists.txt does not contain that unique comment, CodeLite will not generate its own CMakeLists.txt. So you can either write your own CMakeLists.txt files by hand, or else tell CodeLite to generate CMakeLists.txt files and then manually remove the comment to make it stop overwriting them.
Adding user code to a generated CMakeLists.txt
Having CodeLite generate CMakeLists.txt(s) for you is very convenient (e.g. the source file list is always up-to-date with the current workspace file). However you may wish to make changes of your own, and not have them overwritten. To allow this, each generated CMakeLists.txt contains special sections, marked with comments, where you can place your own custom code. Code inserted there will be preserved when CodeLite regenerates the CMakeLists.txt.
For example, let's have a look at a generated CMakeLists.txt file:
# -*- CMakeLists.txt generated by CodeLite IDE. Do not edit by hand -*-

cmake_minimum_required(VERSION 2.8.11)

project(CMakeProject)

# Define some variables
set(PROJECT_PATH "${CMAKE_SOURCE_DIR}/CMakeProject")


#{{{{ User Code 1
# Place your code here
#}}}}

include_directories(
    .
    .

)


# Compiler options
add_definitions(-g)
add_definitions(-O0)
add_definitions(-Wall)

# Linker options

# Library path
set(CMAKE_LDFLAGS "${CMAKE_LDFLAGS} -L. ")

# Define the CXX sources
set ( CXX_SRCS
    ${CMAKE_SOURCE_DIR}/CMakeProject/main.cpp
)

set_source_files_properties(
    ${CXX_SRCS} PROPERTIES COMPILE_FLAGS
    " -g -O0 -Wall")


#{{{{ User Code 2
# Place your code here
#}}}}

add_executable(CMakeProject ${CXX_SRCS} ${C_SRCS})
target_link_libraries(CMakeProject ${LINK_OPTIONS})


#{{{{ User Code 3
# Place your code here
#}}}}
There are 3 blocks marked with
#{{{{ User Code 1, #{{{{ User Code 2 and #{{{{ User Code 3
These blocks are placed at the top, middle and at the end of each generated CMakeLists.txt file. You can safely write your own code inside these blocks.
The blocks' headers and trailers must not be removed