Installing UnitTest++ library
 cd unittest-cpp
 mkdir build-release
 cd build-release
 cmake -DCMAKE_BUILD_TYPE=Release ..
 make -j4
 sudo make install
Creating a new UniTest++ project
From the menu, go to Workspace -> New Project and select project type UnitTest++.
Fill in the project details and click OK.
A new project with a new file is created main.cpp. This file is heavily documented with examples on how manually to add tests.
- In
Project Settings->Compiler->Include Paths add the path to where UnitTest++ installed its headers (on Linux, it's installed under /usr/local/include)
- In
Project Settings->Linker->Library search paths add the path to libUnitTest++.a (on Linux, it's installed under /usr/local/lib/)
Close Project Settings, then make sure the project compiles and links properly.
Adding new tests
You are now ready to add tests to your classes. To do so:
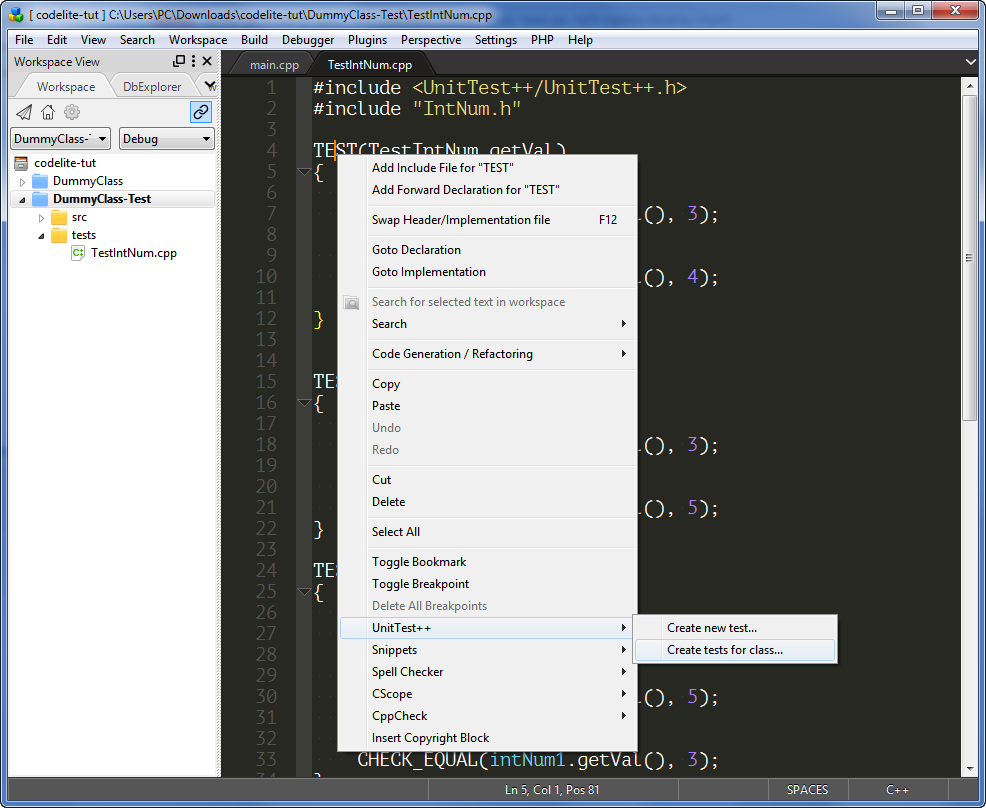
- Right-click on an editor within CodeLite.
- In the context menu that appears, select UnitTest++ -> Create tests for class.
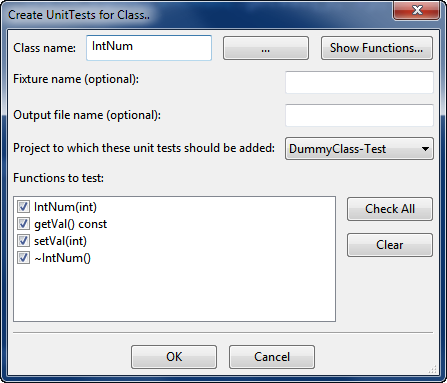
- In the resulting dialog, type the name of the class that you want to test, or click on the [...] button to get a list of classes.
- Select the UnitTest project so that CodeLite associates the tests with it.
- Click on the Show Functions button.
- CodeLite will now display a list of functions belonged to the class; you can check/uncheck which functions you want to test.
- Optionally you can provide a file name (just the name e.g.
test_my_class.cpp ); if left empty CodeLite will automatically choose where to place the tests.
- Click OK.
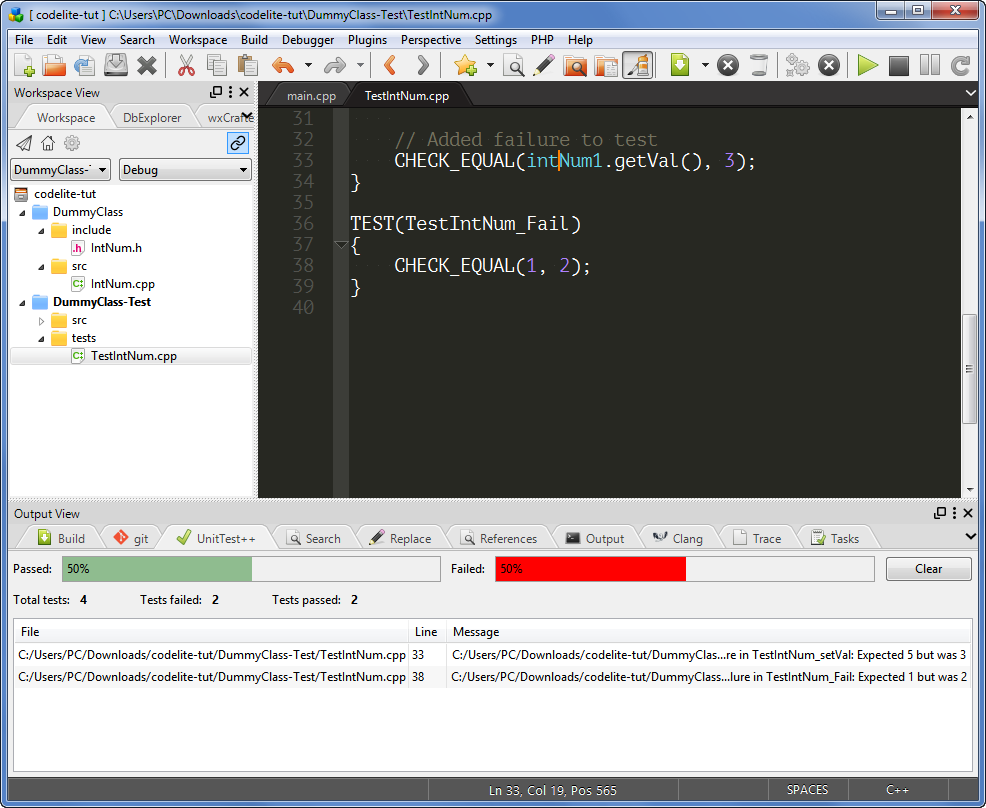
- Finally, compile the Unit Test project and run it as any other project, the output is parsed and displayed in the UnitTest++ tab:


