This tutorial demonstrates how to use wxDataViewCtrl with the auto-generated model class provided by wxCrafter.
Our goal is to create a wxFrame application containing a wxDataViewCtrl with two columns:
- IconText column - wxBitmap placed alongside a wxString
- Text Column - simple wxString column
In addition, we shall add 2 menu items to the File menu:
- New Item - adds a child item to the selected item in the view. If no selection exists, or if the wxDataViewCtrl is empty, create a new top item
- Delete Item - delete the selected item (and its children)
First, let's create a skeleton wxCrafter application (wxFrame based)
- Start CodeLite and click on the New button in the welcome page
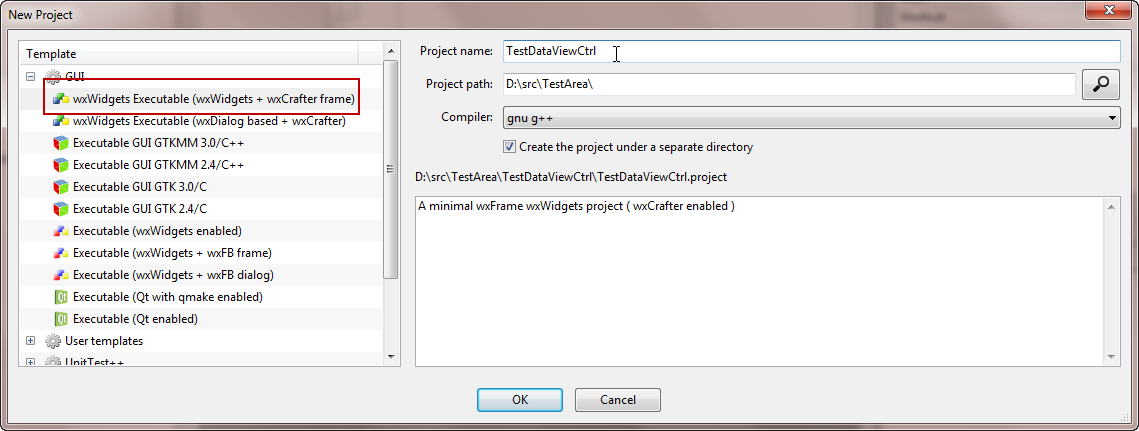
- In the New Project dialog that appears, select wxCrafter project of type wxFrame, fill in the blanks and click OK
- Switch to the wxCrafter tab in the Workspace View
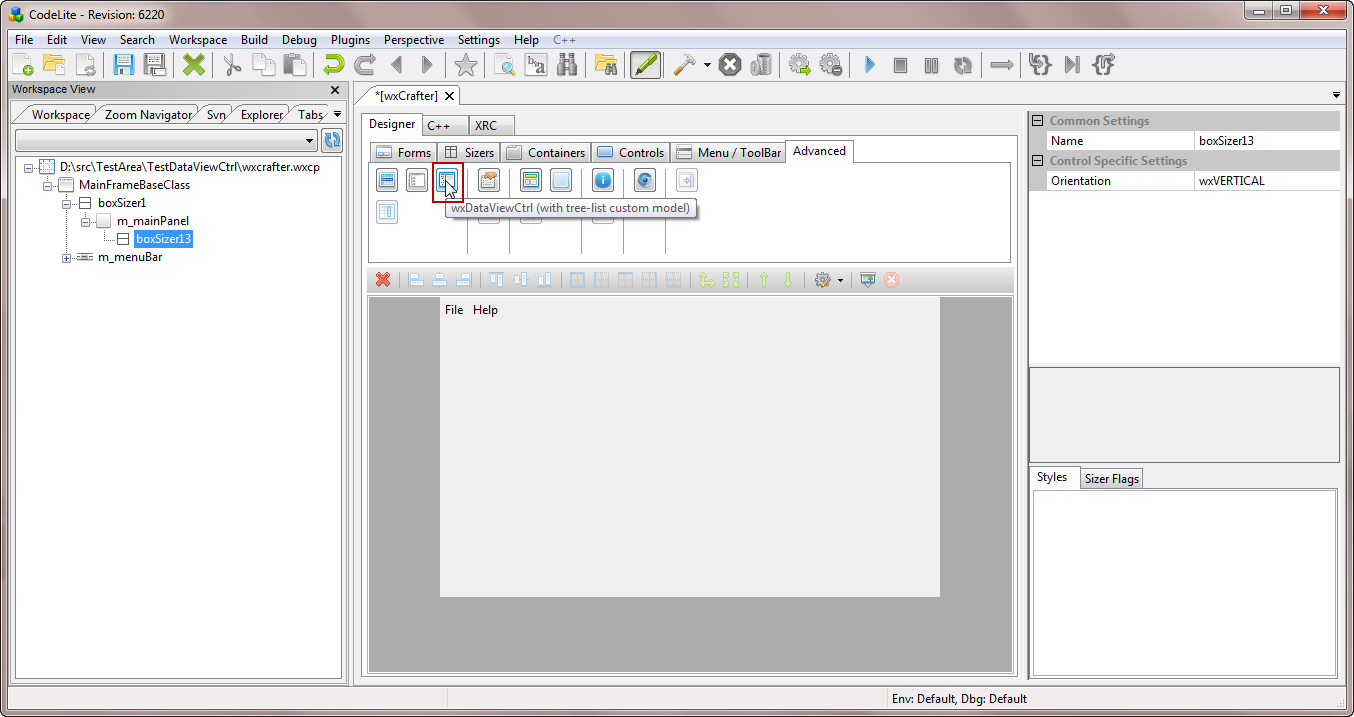
- Select the m_mainPanel's main sizer (in the screenshot below, the main sizer is named boxSizer13)
- In the Toolbar, click the option to add wxDataViewCtrl (with tree-list custom model)
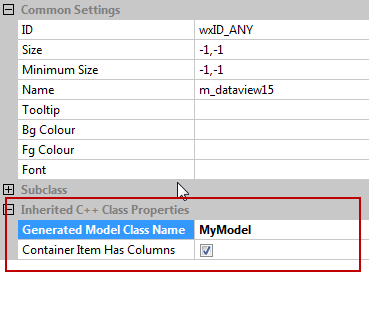
- Select the wxDataViewCtrl (either in the designer or in the tree view) and edit its properties:
- In the Generated Model Class Name field, type the name of the our model (this will be used for both file name and for the class name). In our tutorial, I named the model MyMode
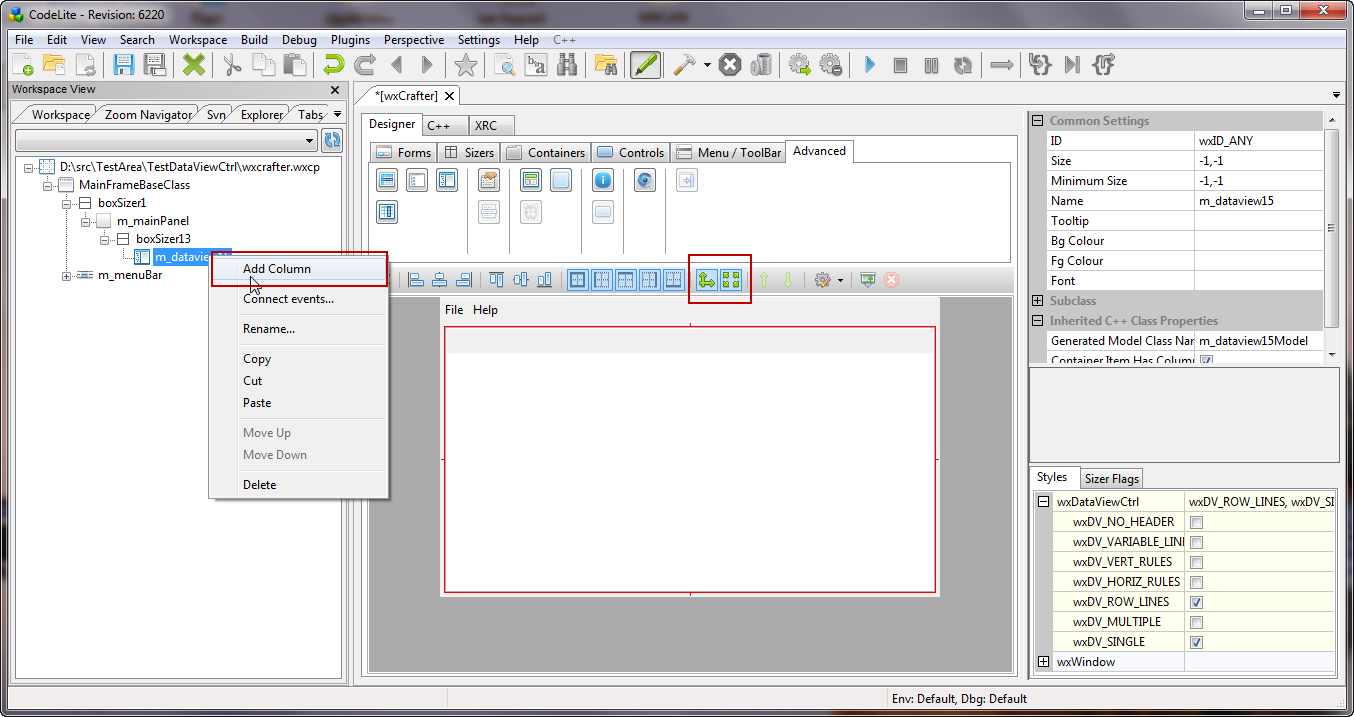
- Set the wxDataViewCtrl Expand flag and make the proportion 1, so it will consume all the remaining space in the wxFrame
- Add columns to the wxDataViewCtrl by right-clicking the wxDataViewCtrl in the tree view and select the option Add Column
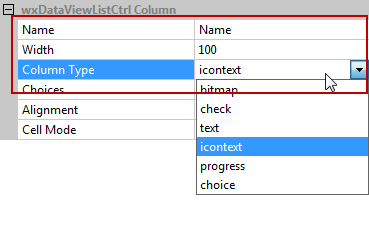
- Add 2 columns and name them
- Change the type of the first column from text to icontext
- Next, we want to add 2 menu items to the File menu:
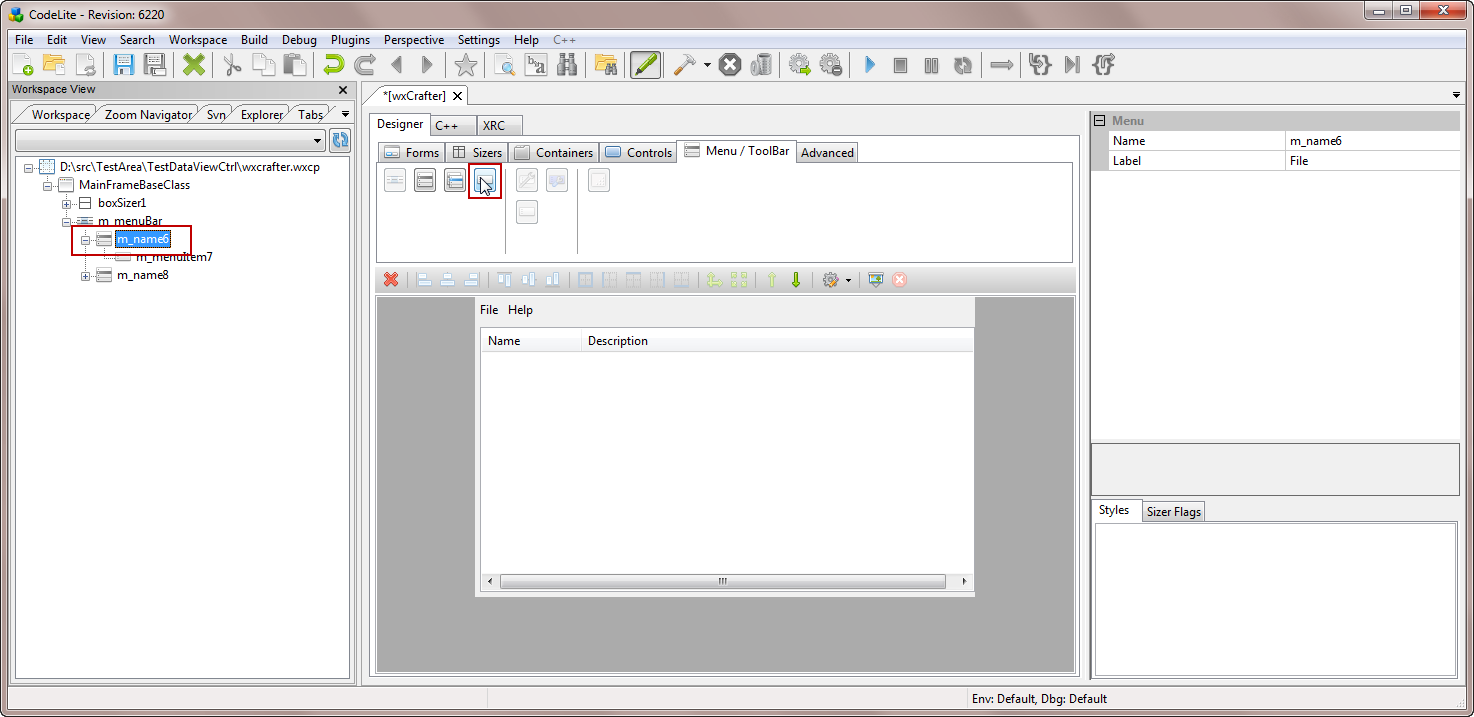
- Select the first child of the m_menuBar
- Add 2 items by clicking on the wxMenuItem button
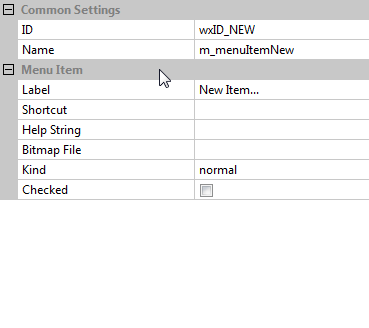
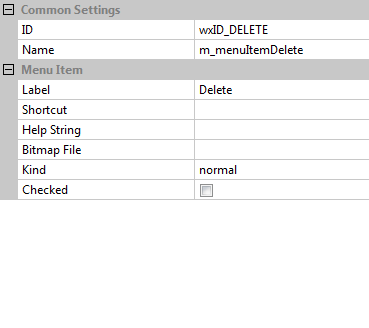
- Assign IDs to the menu items from the properties view and give them a proper label:
- Set the first menu item ID to wxID_NEW and the label 'New Item...'
- Set the second menu item ID to wxID_DELETE and the label 'Delete Item...'
- Next, connect events to the menu items:
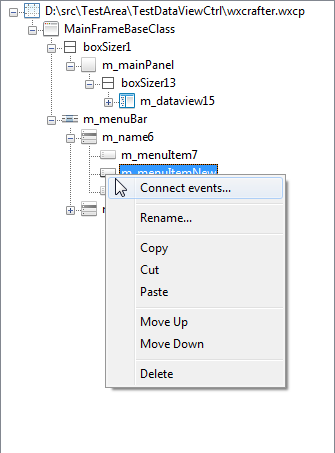
- Right-click on the first menu item and select 'Connect Events'
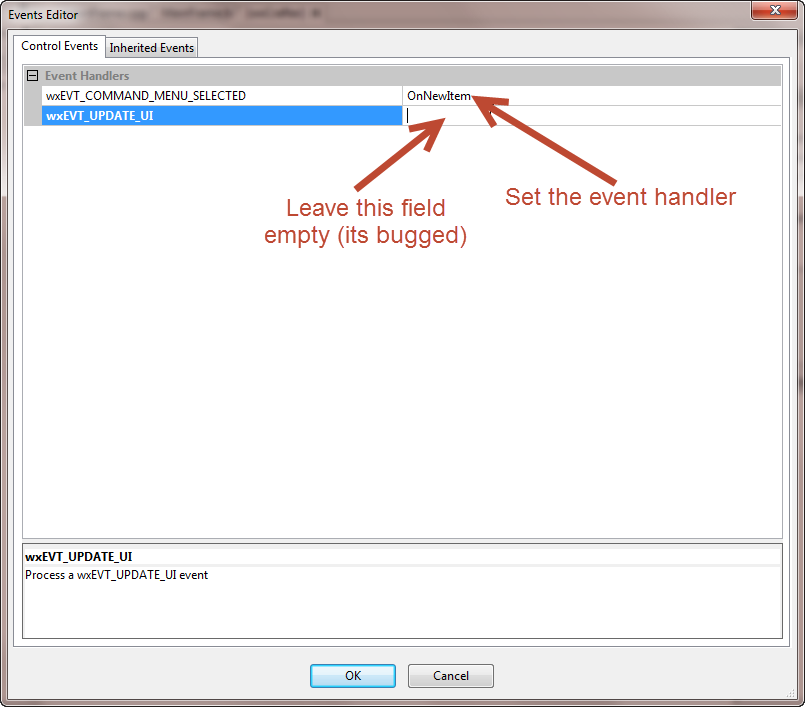
- In Control Events -> wxEVT_COMMAND_MENU_SELECTED set the event handler to
OnNewItem
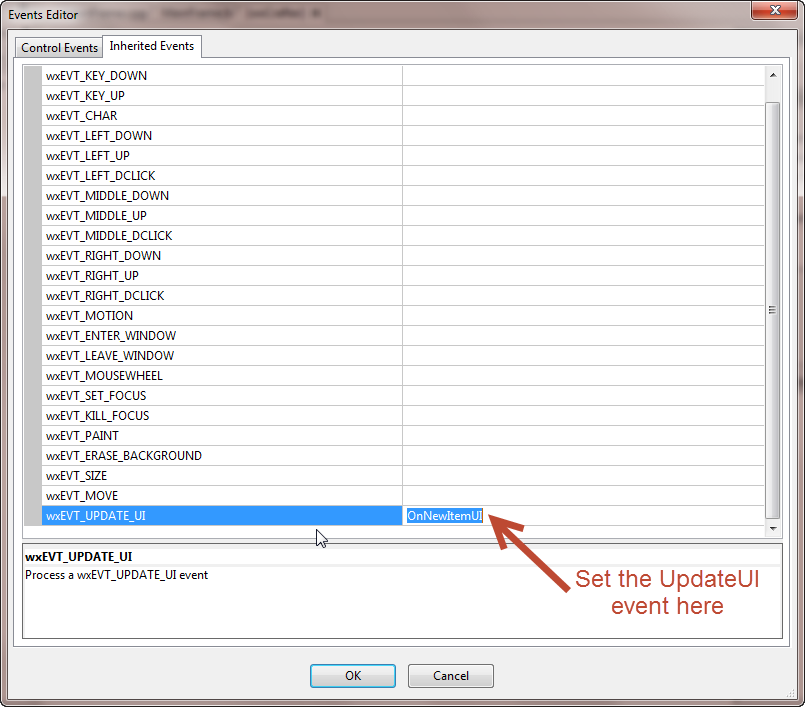
- In Inherited Events -> wxEVT_UPDATE_UI set the event handler to
OnNewItemUI
- Do the same for the second menu item: right-click on it and select 'Connect Events'
- In the Control Events -> wxEVT_COMMAND_MENU_SELECTED set the event handler to
OnDeleteItem
- In the Inherited Events -> wxEVT_UPDATE_UI set the event handler to
OnDeleteItemUI
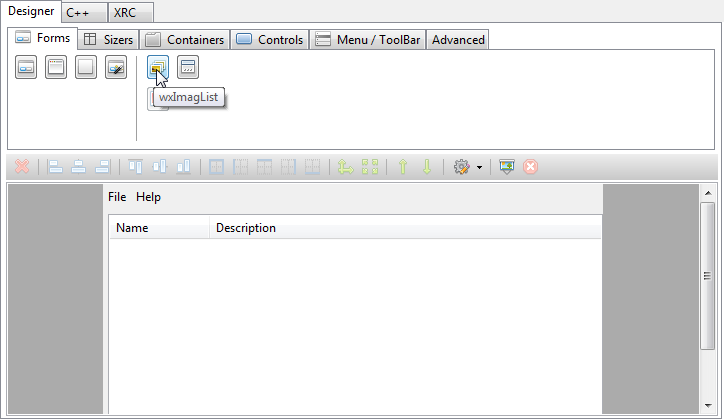
The last thing to do is to create a wxImageList form - this is necessary because we need wxBitmap for the first column which is of type icontext :
- Click on the wxImageList button in the Forms tab
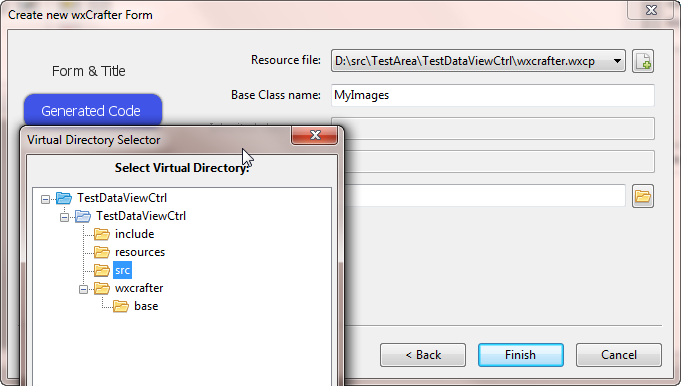
- The Create New wxCrafter Form wizard is launched
- On the second page of the wizard, set the Base Class Name to MyImages
- Select a destination virtual folder
- Click the Finish button
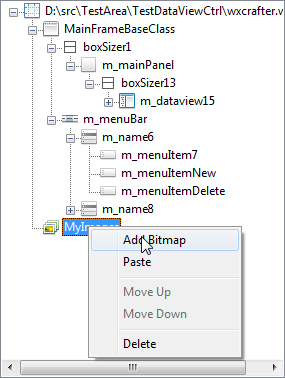
Now, let's add a wxBitmap to the wxImageList :
- Right-click on the MyImages entry in the tree view
- Select Add Bitmap
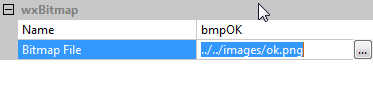
- Edit the newly added wxBitmap by settings its name bmpOK and select a bitmap from the file system
We are now finshed, so click on the Generate Code button
You will notice that in additional to the standard files, 2 new files were generated:
These files are auto-generated and should not be modified by hand. They contain the model code for our wxDataViewCtrl
Next, open the file MainFrame.cpp and replace the four last functions in that file with this:
void MainFrame::OnDeleteItem(wxCommandEvent& event)
{
    // the selection it ought to be valid, because of the OnDeleteItemUI function
    // below
    wxDataViewItem parent = m_dataview15->GetSelection();
    m_dataview15Model->DeleteItem( parent );
}

void MainFrame::OnNewItem(wxCommandEvent& event)
{
    // add child to the current selection
    wxDataViewItem parent = m_dataview15->GetSelection();

    // Prepare the columns
    // Construct a MyImages object and simply load the bitmap by name
    MyImages images;
    wxBitmap bmp = images.Bitmap("bmpOK");  // Load the bitmap by its name

    // Append the columns
    wxVector<wxVariant> columns;
    // add the icon-text variant, luckily for us, the model provides us a helper function
    // that creates a wxVariant from a wxBitmap & wxString
    columns.push_back( m_dataview15Model->CreateIconTextVariant("My Label", bmp) );
    // add the text variant
    columns.push_back( "The description column" );
    m_dataview15Model->AppendItem(parent, columns);
}

void MainFrame::OnDeleteItemUI(wxUpdateUIEvent& event)
{
    wxDataViewItem item = m_dataview15->GetSelection();
    event.Enable( item.IsOk() );
}

void MainFrame::OnNewItemUI(wxUpdateUIEvent& event)
{
    wxUnusedVar(event);
}
Things to note in the above code:
- When attempting to add/delete items, you use the model class m_dataview15Model
- The model class has a helper function named
wxVariant MyModel::CreateIconTextVariant(const wxBitmap& bmp, const wxString &text). This function is useful when you need to add content to an icontext column
- Loading images is easily done by simply constructing an instance of MyImages and loading the bitmap by passing its name (which we set earlier in the designer)
After compiling and running the code, you should see something similar to this:
You can use the File menu to add or delete wxDataViewCtrl items